

Languages and right-to-left
Six languages ship. Adding a seventh takes one file per app.
What ships
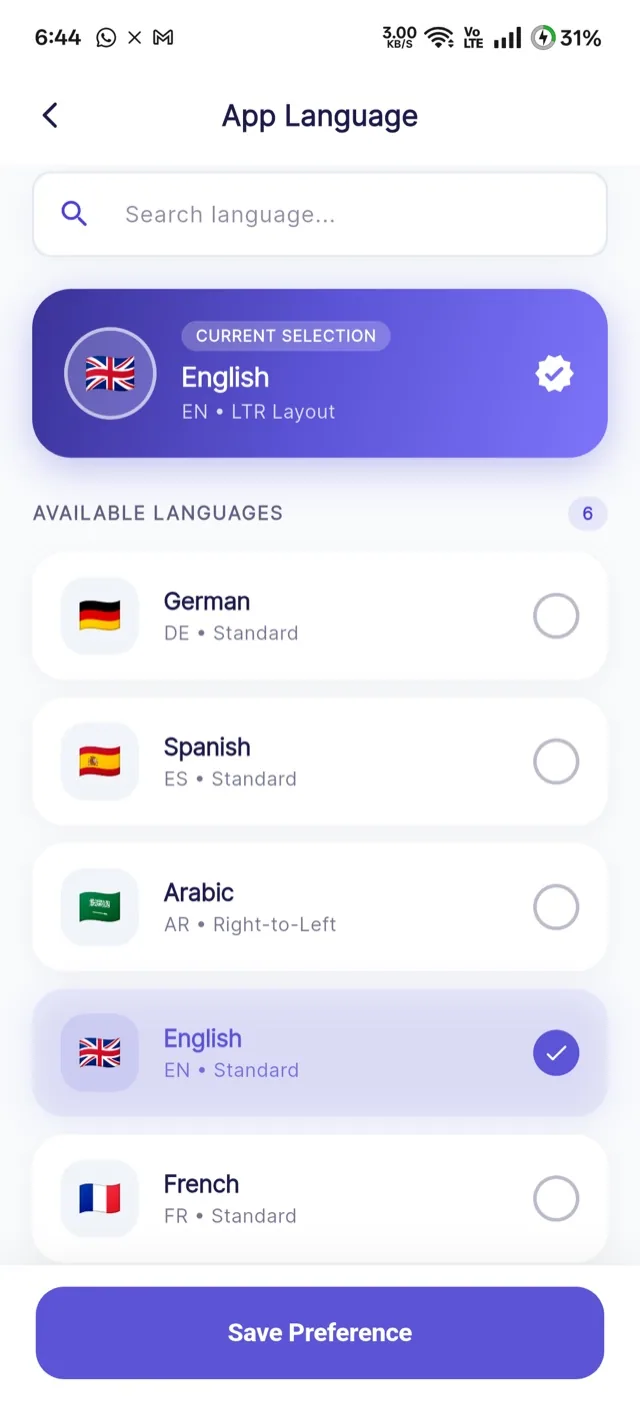
Each is a Dart file in lib/localization/. Which of them your apps offer is decided in System languages — no rebuild needed to turn one on or off.
Right-to-left
Arabic is right-to-left, and the apps mirror the entire layout when it is chosen: navigation moves, icons flip, progress bars fill from the right, and text aligns right. This is built in — you do not configure it.
Check a few screens after enabling Arabic
Mirroring is automatic but your own content is not. Course titles, category names and policy pages that you wrote in English will still read left-to-right inside a mirrored layout — which is correct, but worth seeing once so it does not surprise you.
Add a language in the admin panel
This is the half that needs no code. System & Settings → Settings → System Languages lists every language your apps offer, and is where you add another.
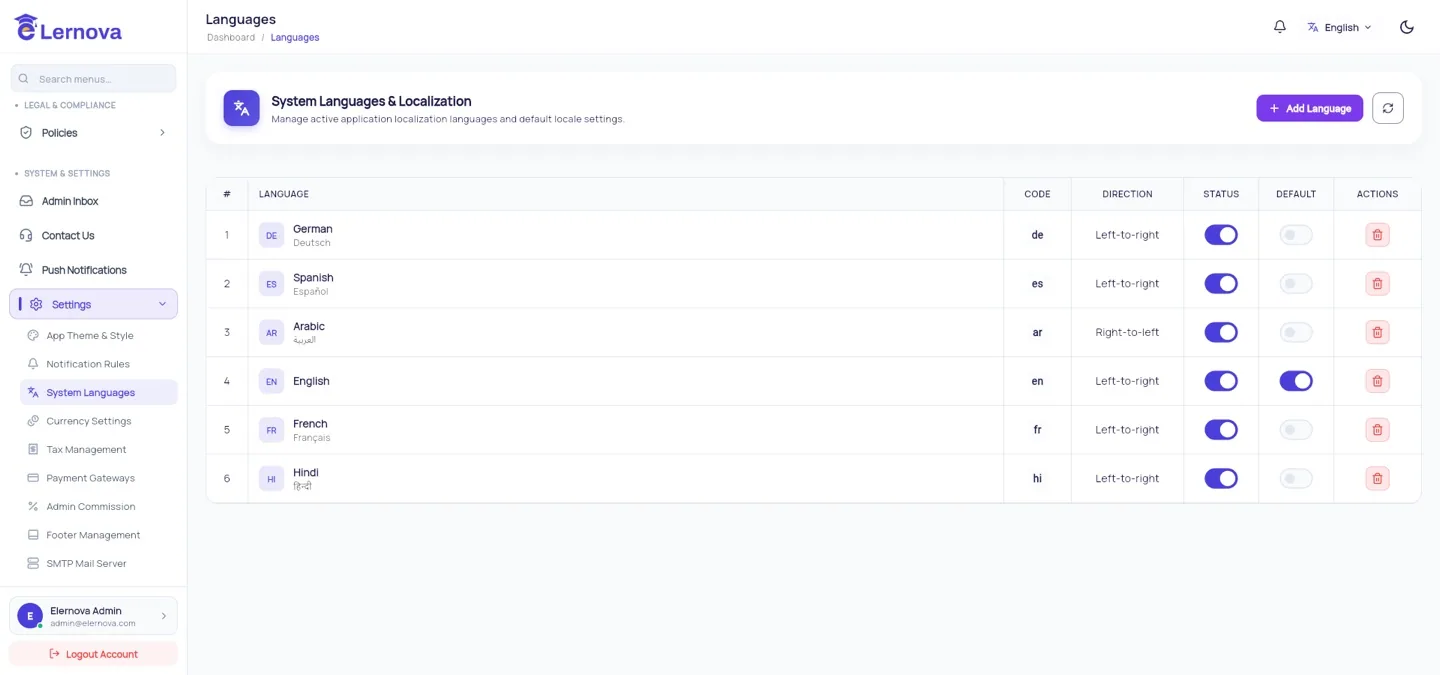
- 1Add Language — pick from the bundled catalogue of 30.
- 2The name and its native spelling, as the app’s picker shows them.
- 3The locale code. It must match the translation file’s name.
- 4Direction comes with the language — Arabic is right-to-left.
- 5Status decides whether it appears in the apps at all.
- 6Default is what a new user gets. Only one can hold it.
- 7Remove a language you added by mistake.
Press Add Language
Pick from the bundled catalogue of 30 languages. It is a searchable list, so type the name or the code rather than scrolling.
The code and direction come with it
You do not type either. The catalogue already knows that Arabic, Urdu, Persian and Hebrew are right-to-left, and the apps mirror their whole layout when one of them is chosen.
Turn Status on
That is what puts the language in the picker inside the student and instructor apps. Switching it off withdraws a language without deleting it or losing the setting.
Choose the default
What a new user gets before they choose anything. Only one language can hold it, so setting a new default clears the old one.
Adding a language here does not translate it
The catalogue gives you the locale — the name, the code and the reading direction. The words come from a translation file inside each app, and only the six above are bundled. Add Chinese and it appears in the picker correctly, but every screen still reads in English, because that is the fallback. Writing that file is the next section.
Translating a new language
Registering the locale is not enough on its own: each app needs a file holding the translated strings. Do this once per app you want the language in — the student app, the instructor app, and the admin panel if your staff need it.
Copy the English file
cd user_app/lib/localization
cp en.dart pt.dart
Translate the values
Each file is a map of keys to strings. Change only the right-hand side:
const Map<String, String> pt = {
  'home': 'Início',
  'my_learning': 'Minha aprendizagem',
  'wishlist': 'Lista de desejos',
  // ...
};
Never translate a key
The left-hand side is what the code looks up. Change 'home' to 'início' and that string disappears from the app everywhere. Only ever edit the text on the right.
Register it
Add the new map to app_translation.dart alongside the others, keyed by its locale code.
Add it in the admin panel
Settings → System Languages → add the language with the same code, and enable it.
Rebuild and test
flutter runSwitch to the new language in the app and walk through the main screens.
Watch for text that no longer fits
German and French run 20–30% longer than English. A button that fits "Buy now" may not fit "Jetzt kaufen". After translating, check buttons, tab labels and card titles on a small phone — that is where overflow shows first.
Fonts must cover the script
If you add a language in a new script, confirm the font you chose in Colours & fonts has those glyphs. Missing glyphs render as empty boxes. Noto Sans covers almost everything.