

Push notifications
Android works out of the box. iPhone needs a key from Apple.
Push is handled by Firebase Cloud Messaging and delivered by the sendPush Cloud Function. If the functions are deployed, Android and web push already work. iOS needs one upload.
iOS: create an APNs key
At developer.apple.com → Keys, press +, name it, tick Apple Push Notifications service (APNs) and continue. Download the .p8 file and note the Key ID and your Team ID.
The .p8 downloads once
Apple will not let you download it again. Save it somewhere permanent immediately. If you lose it you must revoke the key and create a new one.
Upload it to Firebase
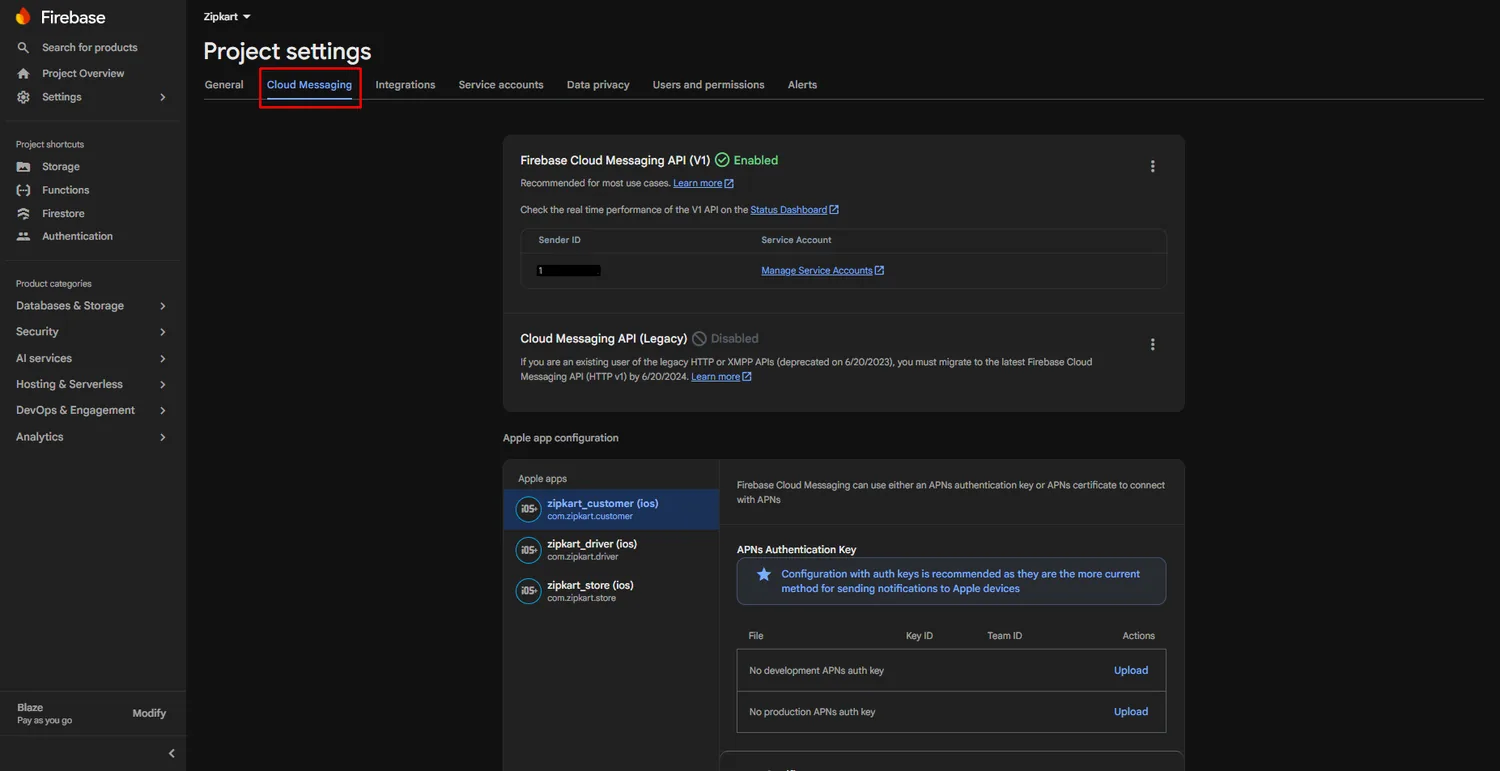
Firebase console → ⚙ Project settings → Cloud Messaging → under Apple app configuration, upload the .p8 with its Key ID and Team ID. Do this for the student app and the instructor app.
One key covers everything
A single APNs auth key works for every app in your Apple account, in both development and production. Upload the same file to both apps.
iOS: enable the capability
In Xcode → Runner → Signing & Capabilities → + Capability → Push Notifications. Without it, iOS never issues a token.
Web: add a VAPID key
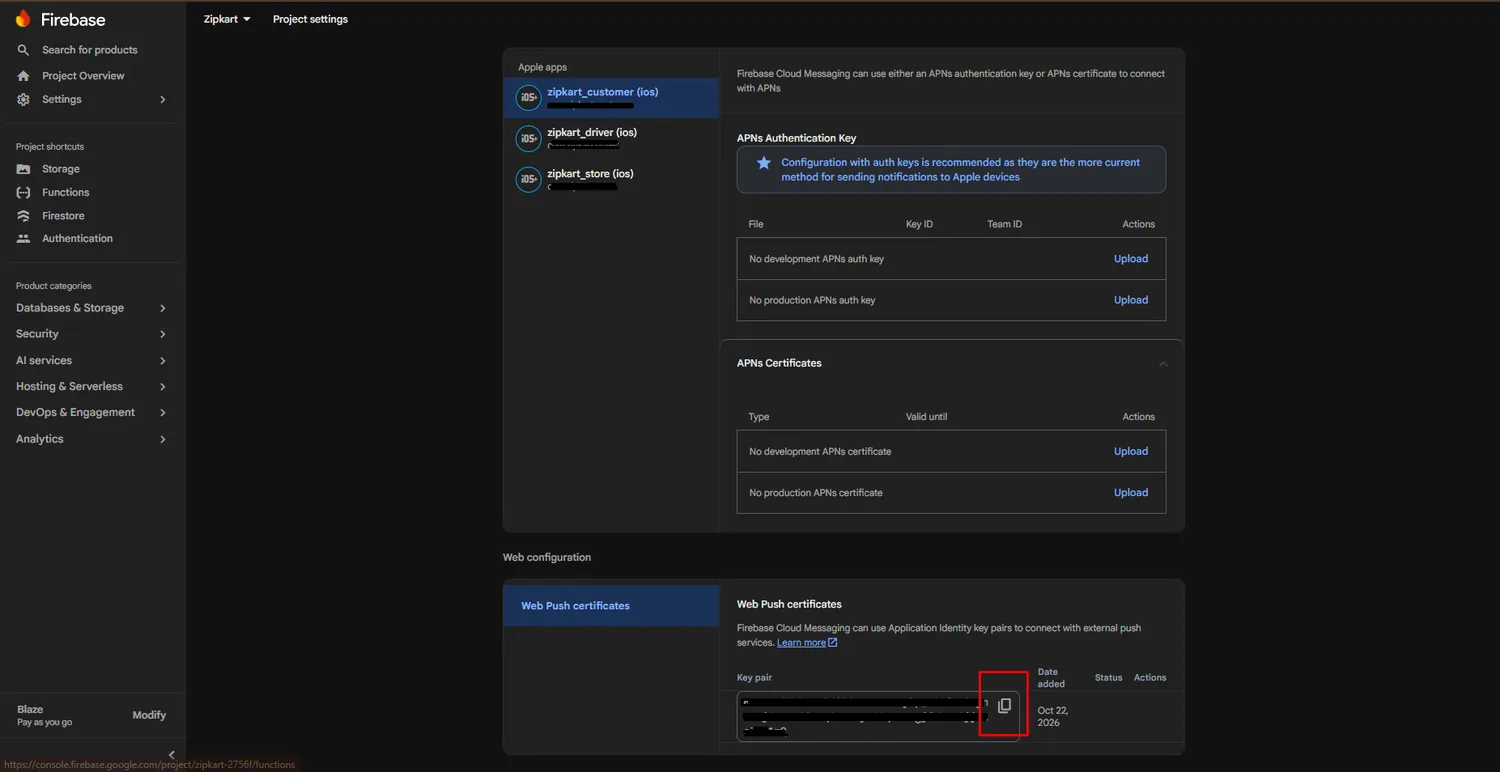
Same Cloud Messaging page, under Web Push certificates, press Generate key pair. The web apps use it to register for browser push.
Paste the keys in the admin panel
Getting the values is only half of it — the apps read them from your own settings, not from the Firebase console. Open the admin panel → System & Settings → Settings → Notification Rules and paste them there.
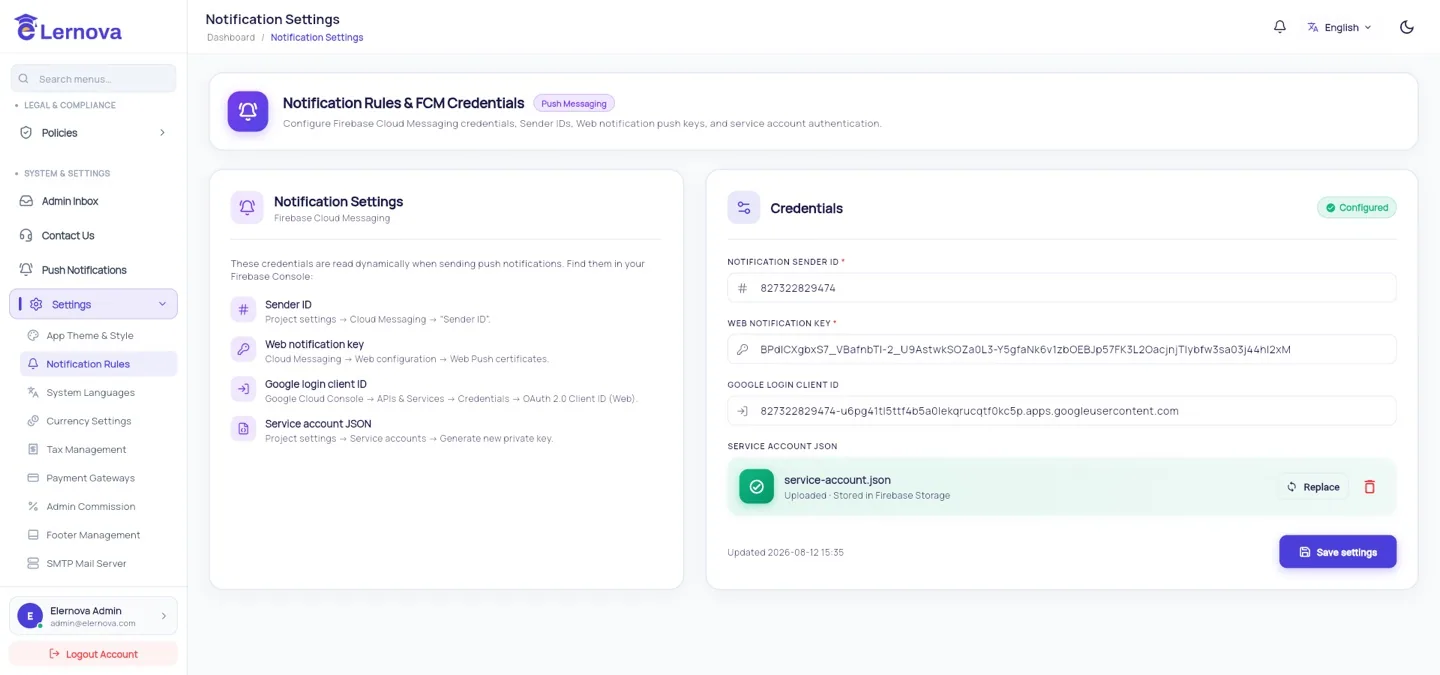
- 1Where to find each value in the Firebase and Google consoles.
- 2Notification Sender ID — Project settings → Cloud Messaging.
- 3Web notification key — the VAPID key you just generated.
- 4Google login client ID, if you offer Google sign-in on the web.
- 5Service account JSON, uploaded and kept in Storage.
- 6Reads Configured once the required fields are filled.
- 7Save settings. The apps pick the values up on their next launch.
The Sender ID and web notification key are both required. The Google login client ID is only needed if you offer Google sign-in on the websites, and the service account JSON is what lets the backend authenticate when it sends.
Send a test
Admin panel → SYSTEM & SETTINGS → Push Notifications. Write a message, pick an audience and send. Check a real Android phone, a real iPhone and a browser.
iOS push never works in the simulator
The iOS Simulator cannot receive remote notifications. You need a real device, and the app must be installed from a build signed with a profile that has the Push Notifications capability.
Which notifications send automatically
Course approvals, purchases, reviews, Q&A replies, assignment marking, payout updates and live-class reminders all fire on their own. There is no per-event switch: the app writes a notification and the backend delivers it. What you control is whether push can be delivered at all, which is the keys above — and what you send yourself, from Push Notifications.
| Problem | Cause |
|---|---|
| Works on Android, never on iOS | APNs key not uploaded, or the capability is missing |
| Nothing anywhere | The Cloud Functions are not deployed — deploy them |
| Worked, then stopped on one phone | The device token changed — it refreshes on reinstall and after long inactivity |
| Web push silently ignored | The browser permission was denied; the user must re-allow it in site settings |
| Delivered but no sound or banner | The user has notifications muted for the app in their OS settings |