

Step 3 · Admin Panel SetupCore settings
Currency
Set the currency every price is shown and charged in. Add as many as you like; one is in use at a time.
2 min
Open SettingsCurrency.
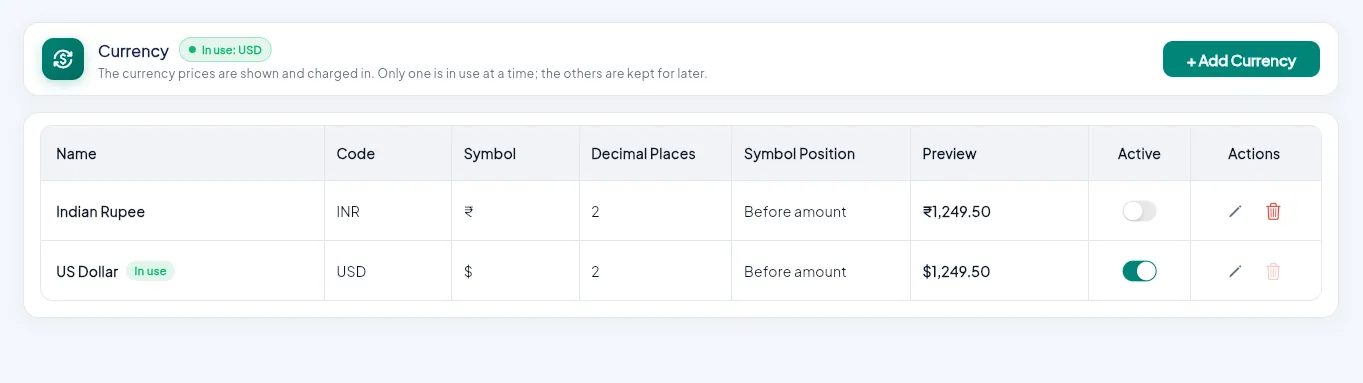
- 1Add a currency.
- 2Symbol position: before or after the amount, with a live preview.
- 3The Active switch picks the currency in use.
- 4Edit or delete.
Add your currency#
Click + Add Currency and fill in:
| Field | Example |
|---|---|
| Currency Name | Indian Rupee |
| Code | INR (used by the payment gateways) |
| Symbol | ₹ |
| Decimal Places | 2 |
| Symbol Position | Before amount (₹100) or After amount (100 ₹) |
Turn it on#
Switch Active on for the currency you sell in. Only one currency is in use at a time; turning one on turns the previous one off. The Preview column shows how an amount will look.
Match your payment gateways
Online gateways charge in the currency code you set here. Check that your gateway accounts accept that currency, for example Razorpay for INR, Paystack for NGN or Xendit for IDR.
Change it before you take orders
Prices are stored as plain numbers. Switching currency later does not convert existing prices, so set it before you add your products.