Push Notifications Setup
Order alerts reach customers, stores and riders automatically. Add the iPhone push key and the web push key, then choose which messages go out and what they say.
Every notification is sent by your Cloud Functions through Firebase Cloud Messaging. The apps only receive them. No key file goes into any app.
| Who | Where | Receives |
|---|---|---|
| Customer | Customer app and website | Order updates, returns, refunds, wallet, cart reminders, back in stock, chat and your offers |
| Store | Store app and store panel | New orders (ringing), cancellations. Always on. |
| Delivery boy | Delivery boy app | Order requests (ringing like a call), assignments, return pickups, wallet changes |
| Admin | Admin panel bell | New orders, returns, withdrawals and rider requests |
1. Android#
Nothing to do. Notifications work as soon as the app is connected to Firebase.
2. iPhone: the APNs key#
Apple delivers iPhone notifications. Firebase needs your Apple push key to talk to Apple.
Create the key#
Apple Developer → Certificates, IDs & Profiles → Keys → +. Tick Apple Push Notifications service (APNs), register, and download the .p8 file (only once). Note the Key ID and your Team ID.
Upload it to Firebase#
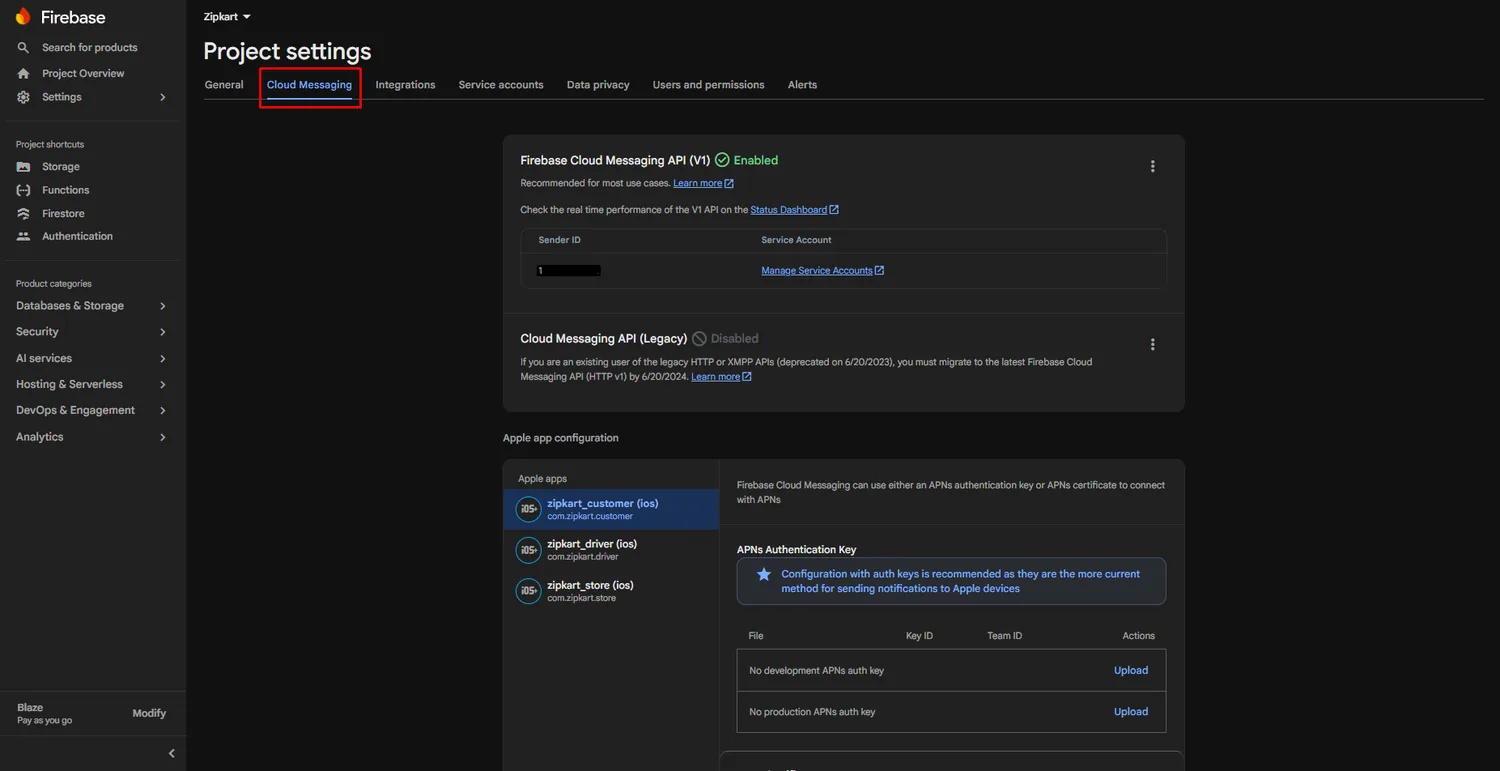
Open the Cloud Messaging tab in Firebase project settings. Under Apple app configuration, pick each iOS app and upload the .p8 with the Key ID and Team ID. One key works for all three apps.
3. Websites: the web push key#
The customer website and the store panel can show browser notifications. They need two values from Firebase.
Copy the Sender ID and the key pair#
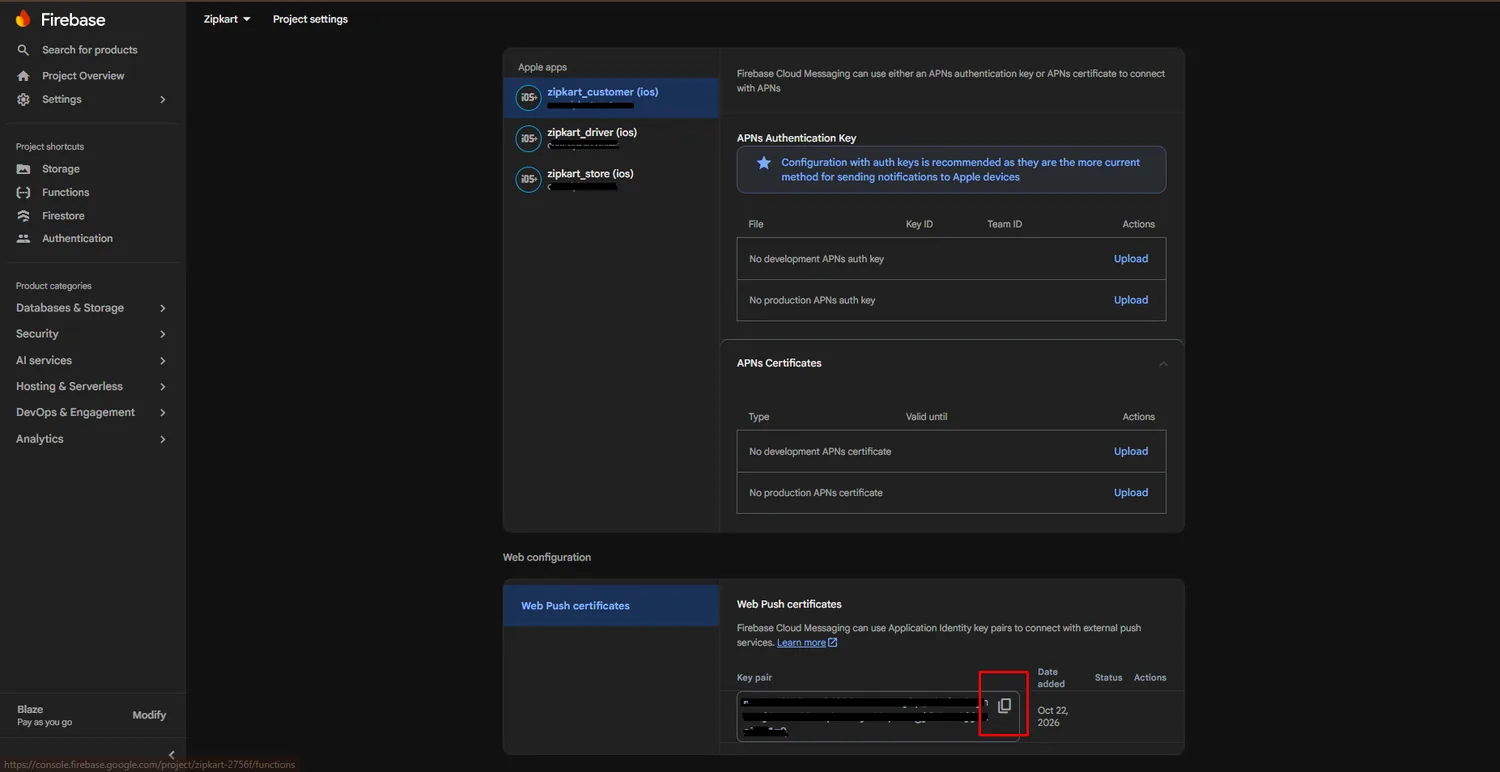
On the same Cloud Messaging tab, copy the Sender ID. Scroll down to Web configuration → Web Push certificates, click Generate key pair if there is none, and copy the key.
Paste them in the admin panel#
Open SettingsFirebase Settings, paste both values and click Update.
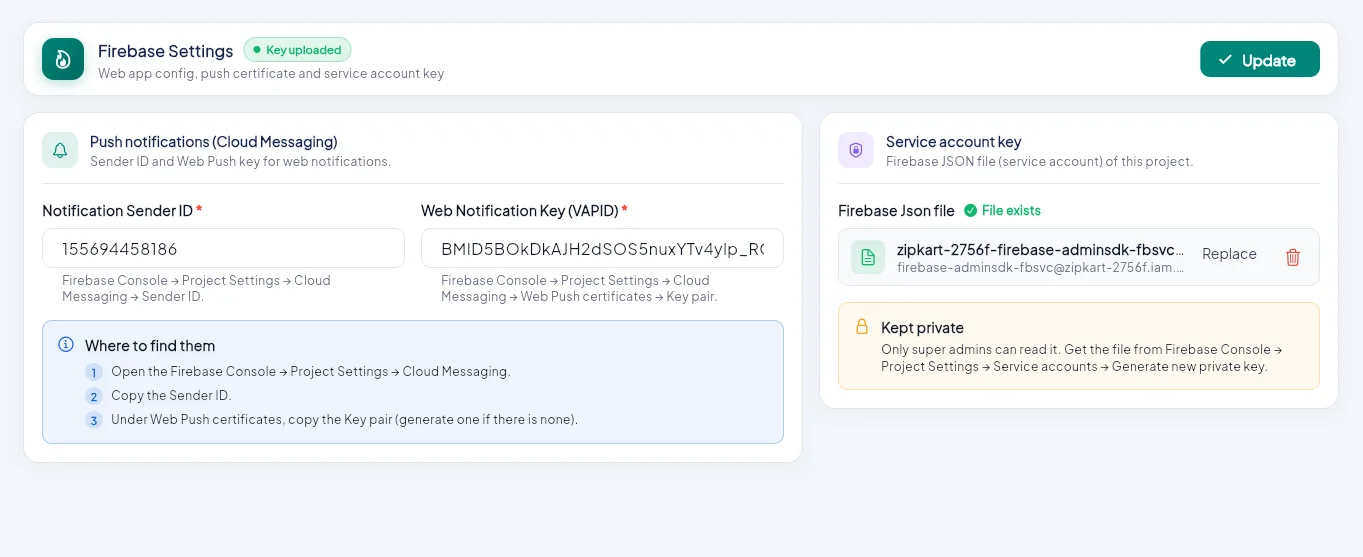
- 1Notification Sender ID.
- 2Web Notification Key (VAPID).
- 3Where to find them.
- 4Service account key (optional).
- 5Update.
Websites need HTTPS
Browser push works only on https:// (and on localhost while testing). Customers turn it on with Turn on under Notifications in their profile. Safari on iPhone shows web notifications only after the site is added to the Home Screen.
4. Choose the messages and their texts#
Open SettingsNotification Settings. Every event is listed per audience, with a switch for Mail and one for Push. A change saves at once.

- 1Show one audience.
- 2Who gets it.
- 3Email on or off.
- 4Push on or off.
Click a row to edit its title and message in every language. Click a placeholder such as {{customer_name}} or {{order_id}} to insert it; the server fills it in. Notification Templates and Email Templates list the same texts on one searchable page.
The new-order sound
The store and delivery boy apps ring with new_order.wav. To use your own, replace the file in android/app/src/main/res/raw/ and ios/Runner/ and keep the name. iOS plays only sounds shorter than 30 seconds.
Test it#
- Sign in to each app on a real phone and allow notifications.
- Place a Quick order: the store rings, then a rider gets the request.
- Move the order on: the customer gets each update.
- On the customer website, turn on notifications, close the tab and send a test.
- The admin panel bell shows the new order.